
Cloudflare Custom Domain Instructions

We've been getting more and more groups who want to use their own domain name with our service. There are a few prerequisites before we can complete the actual setup, though.
- You’ll need to have your domain set-up and managed by Cloudflare DNS. It’s easy to do, is free, and has other benefits as well. The setup for this varies between different domain registrars. If your domain is not on Cloudflare or you do not own one yet, it probably makes more sense to buy the domain through your Cloudflare account. Most are around $10 for 1 year. Ask us for instructions on pointing your already owned domain name to Cloudflare DNS.
- You need to activate Cloudflare Access/Zero Trust. This is also free, but it does ask for a credit card because it does have some premium features. We are only using free features, though.
Step-by-step Setup
Click the images for a better view, then use the back button in your browser to get back to the instructions
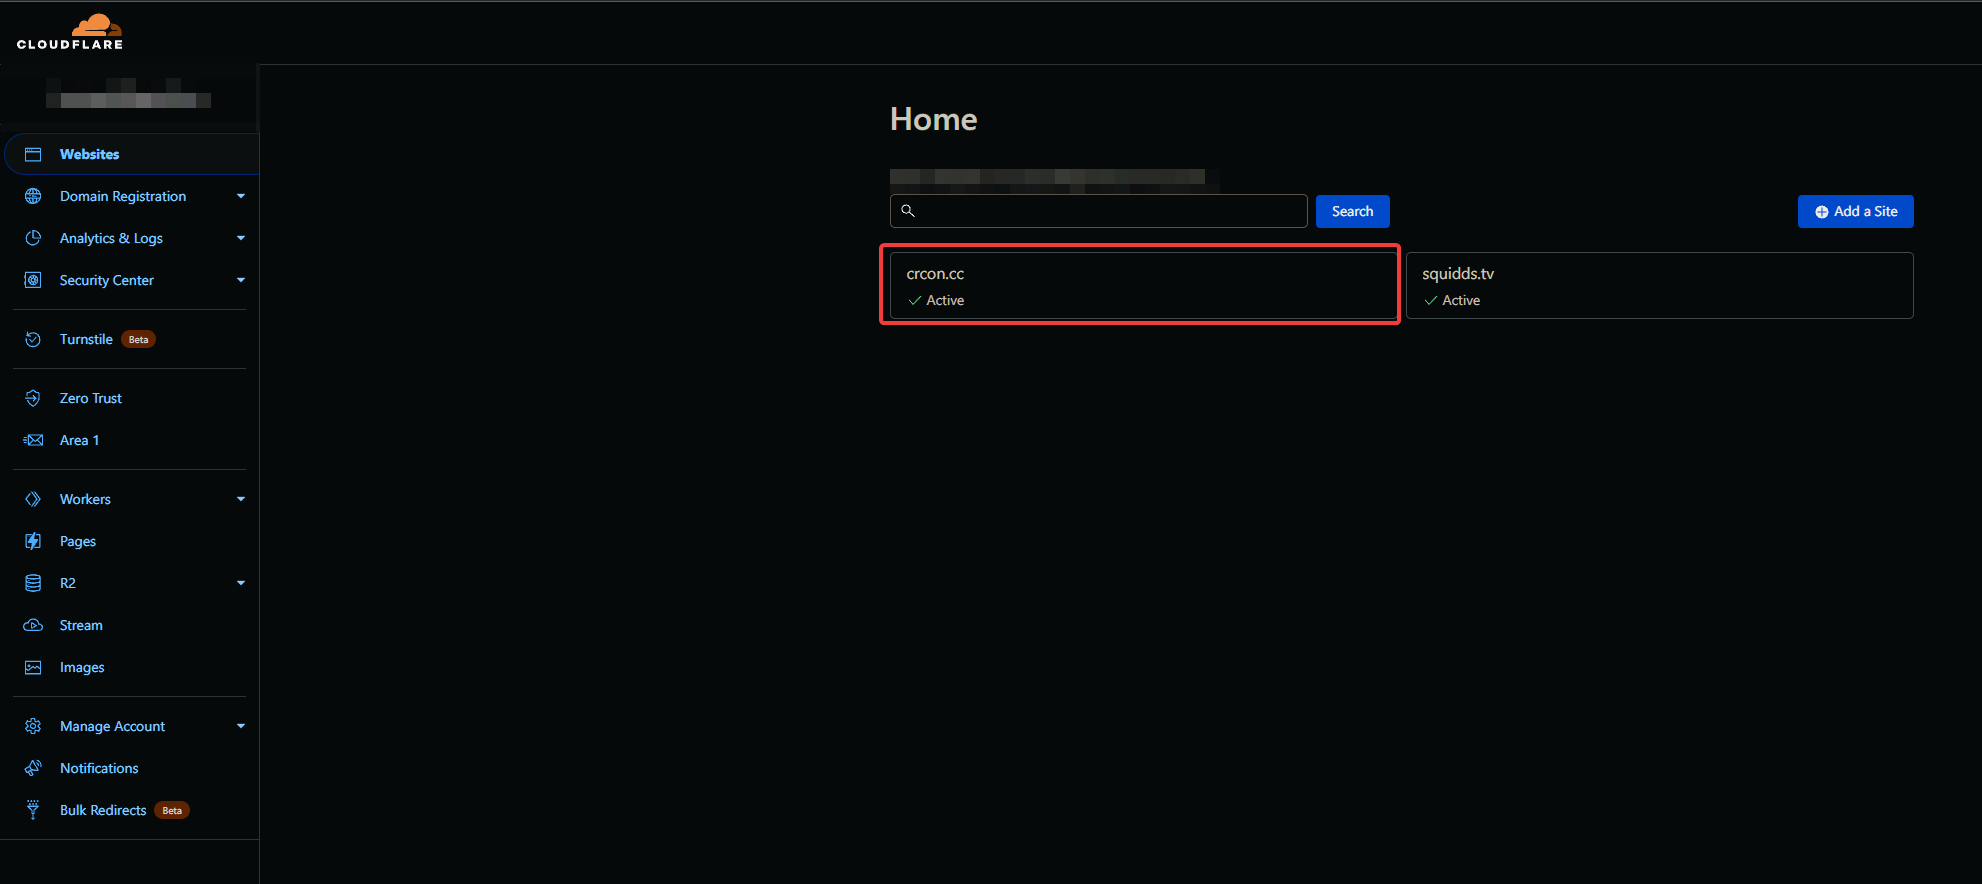
- Once you’ve gotten notification that your domain has properly propagated and Cloudflare is ready to use, you will see a screen similar to this, but it will show your domain name, not crcon.cc. Select your domain.
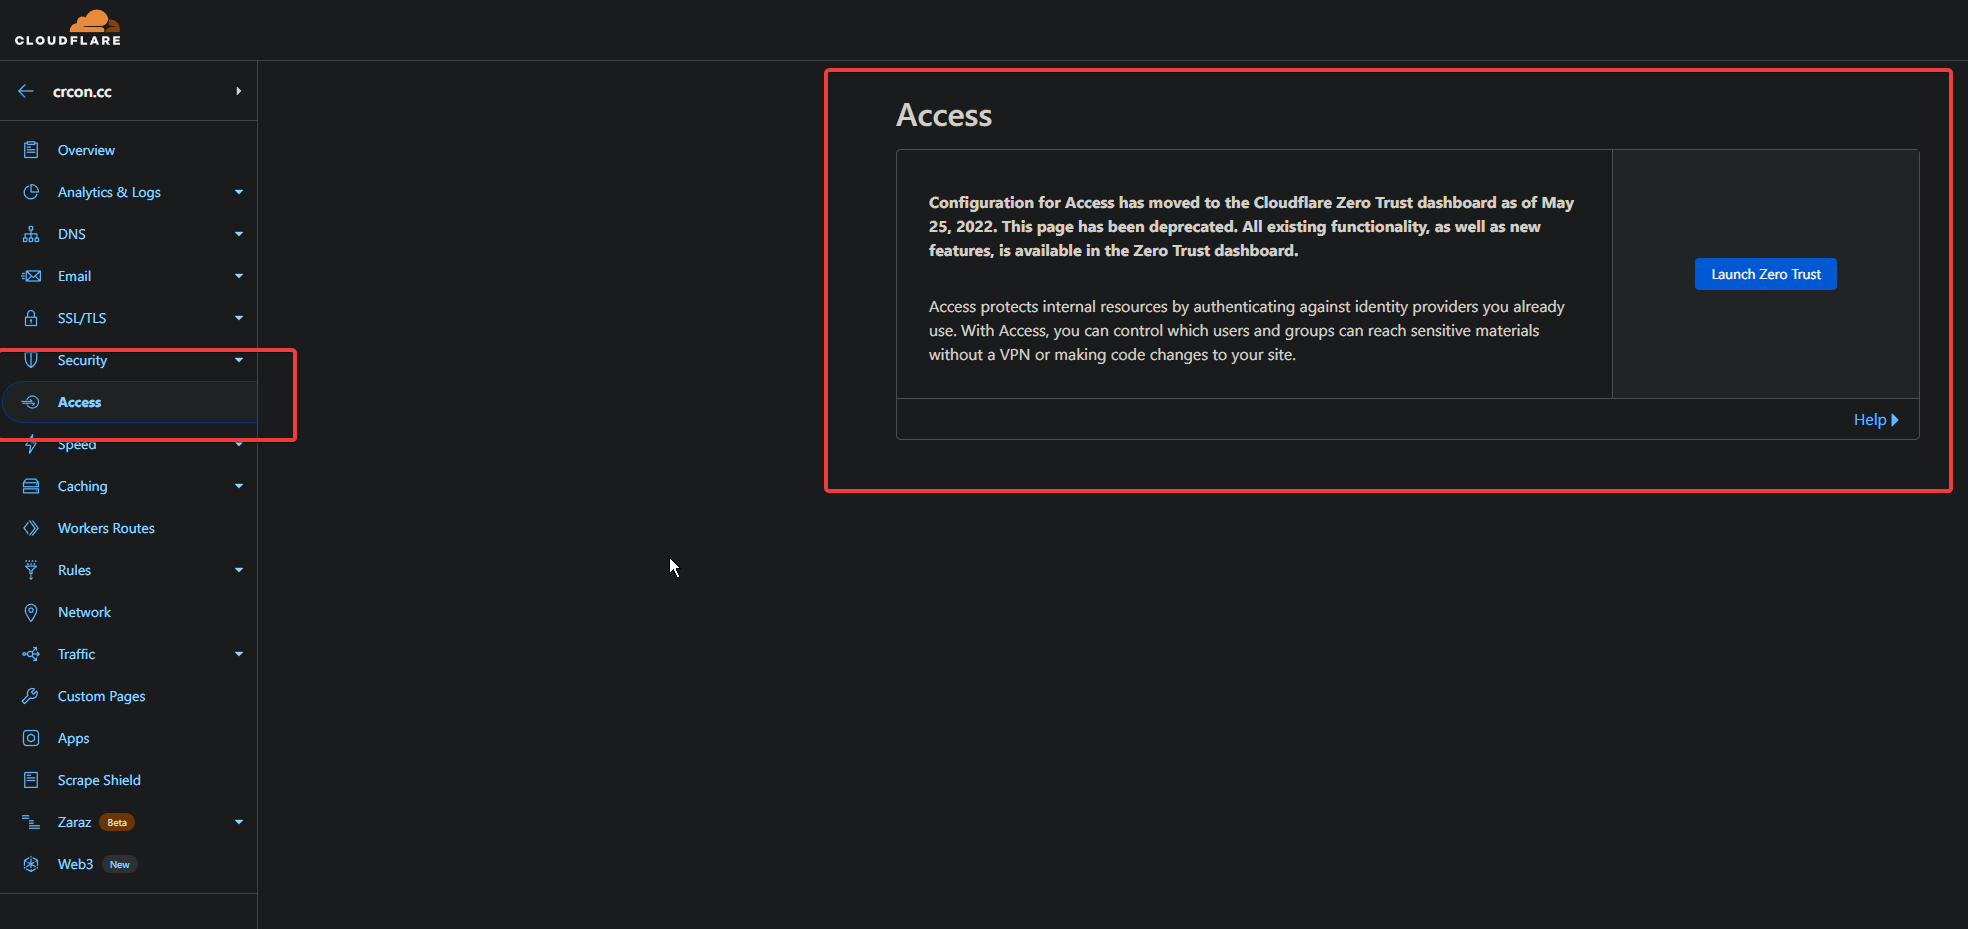
2. The next thing you'll see is the full Cloudflare menu, select the word "Access" on the left side.

3. After you hit "Access", it will bring you to the Cloudflare Zero-trust dashboard. It may ask you to enter credit card information to continue. Like I said at the beginning, you'll need to enter in your payment information, but we are using free Cloudflare features, and you will not be charged for this.
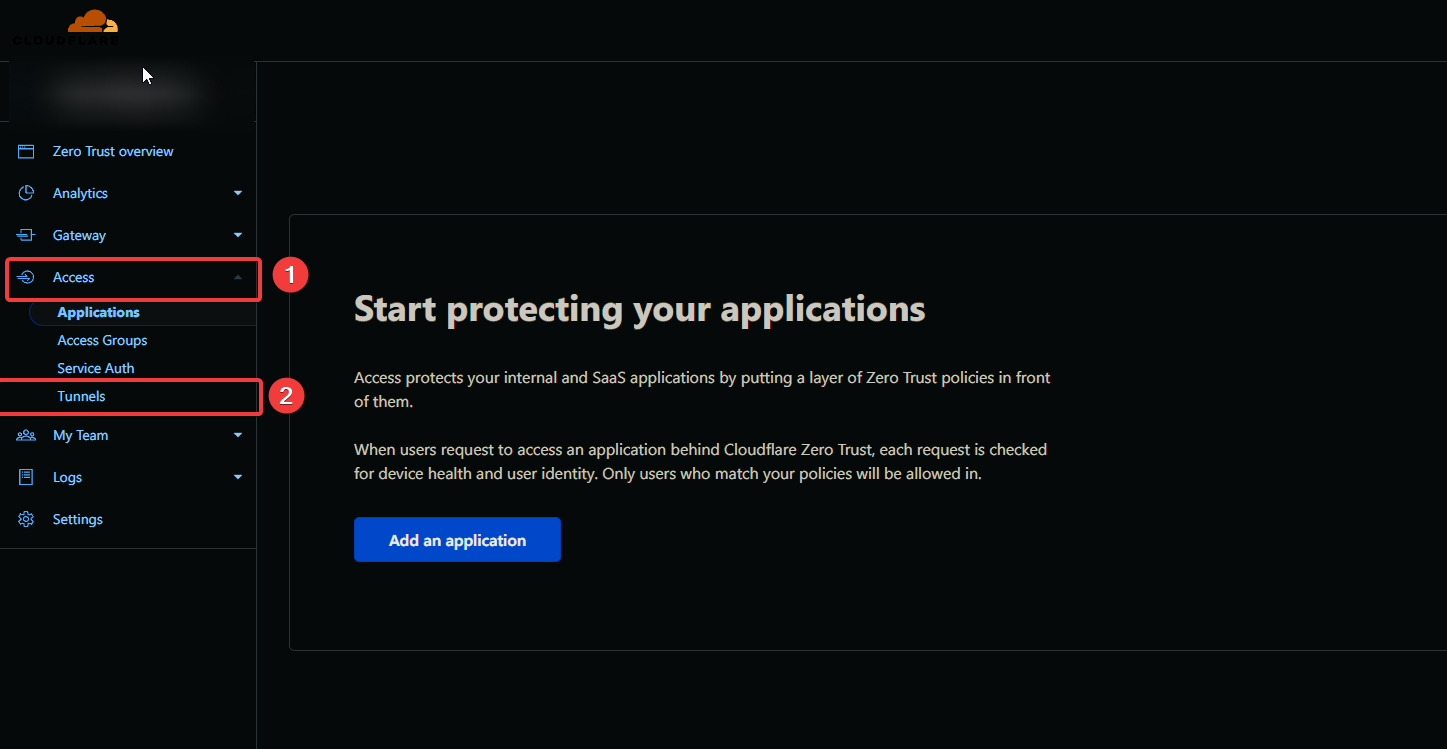
4. After you launch the Zero Trust dashboard, you will hit "Access" once again, and then "tunnels" after that.
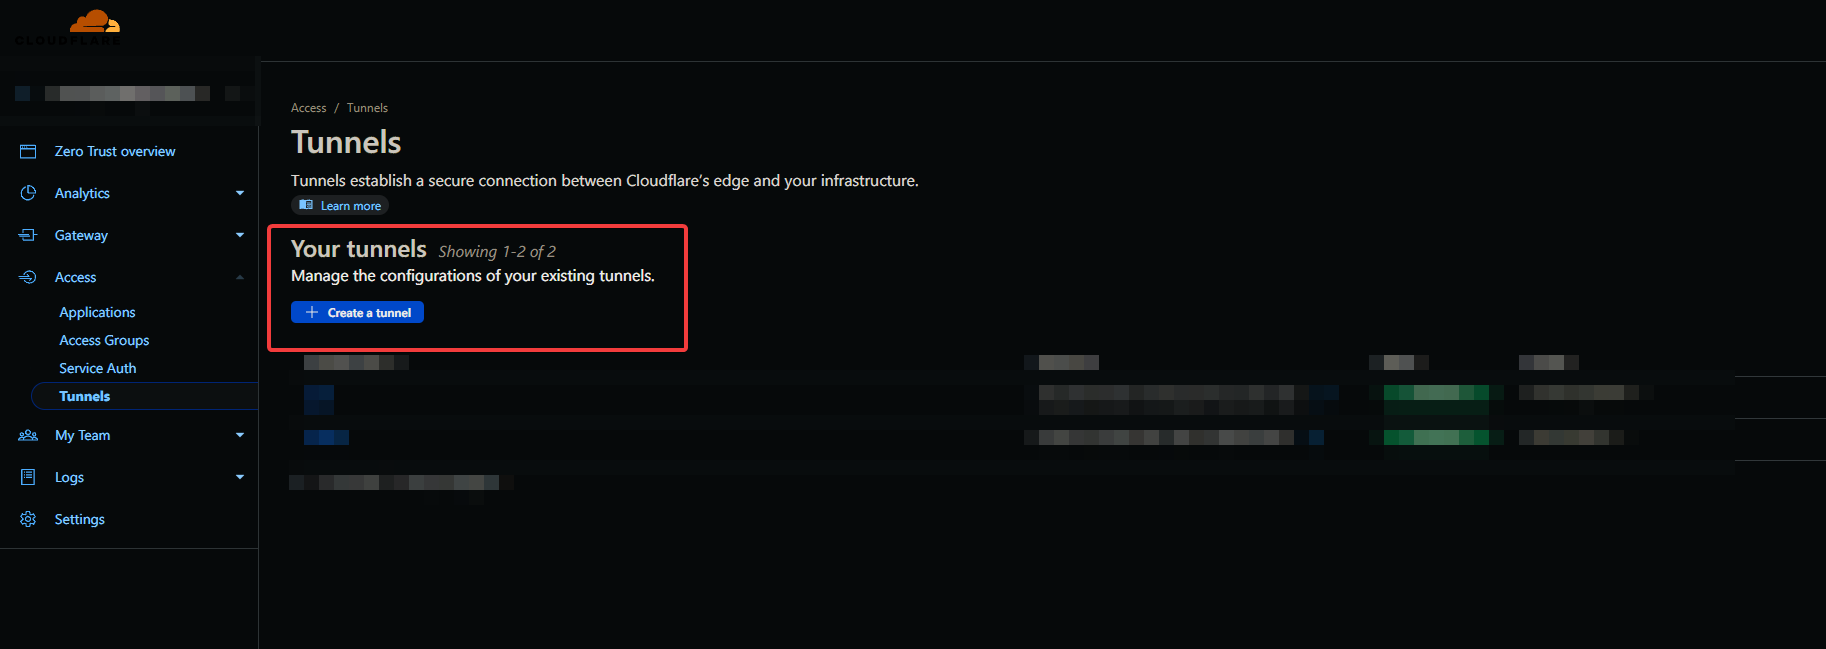
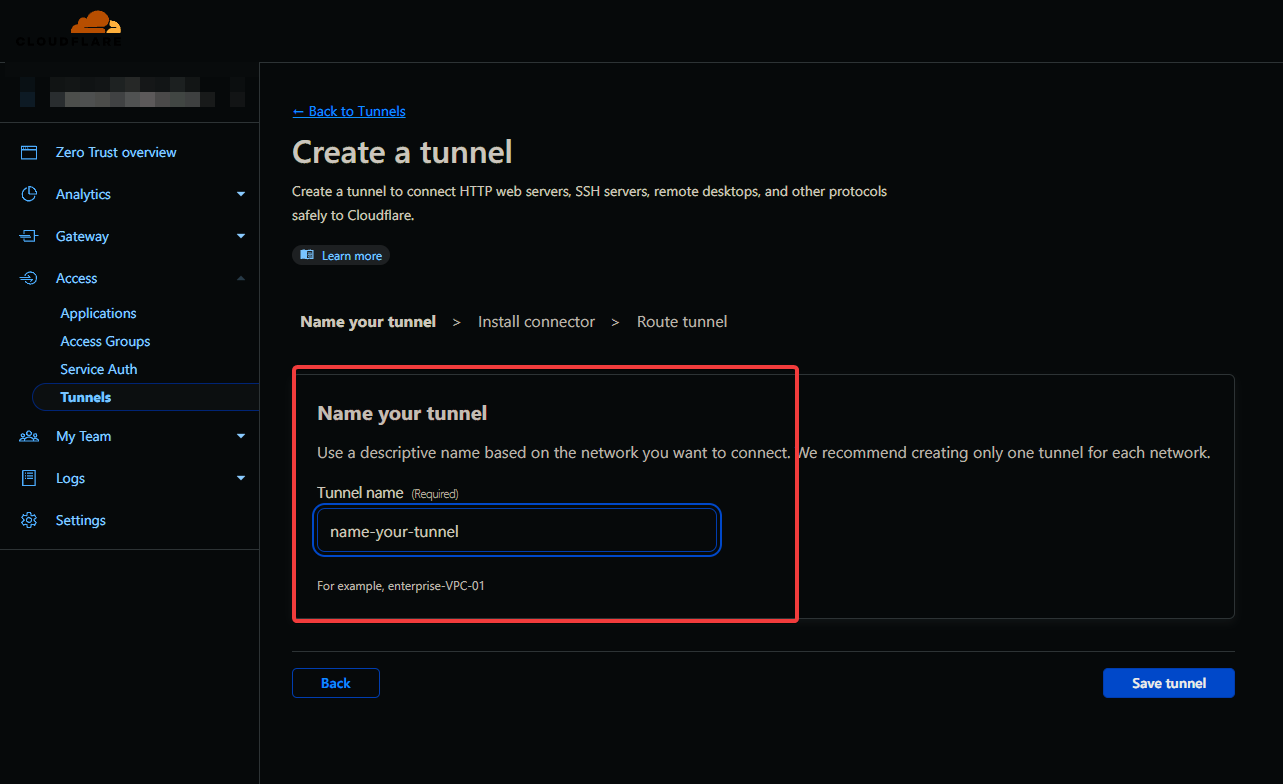
5. On the next screen, you'll click on "Create a tunnel"
6. Give your tunnel a name. The name is not important, it is only to identify the tunnel within your Cloudflare account. Hit "Save tunnel" after you give it a name.
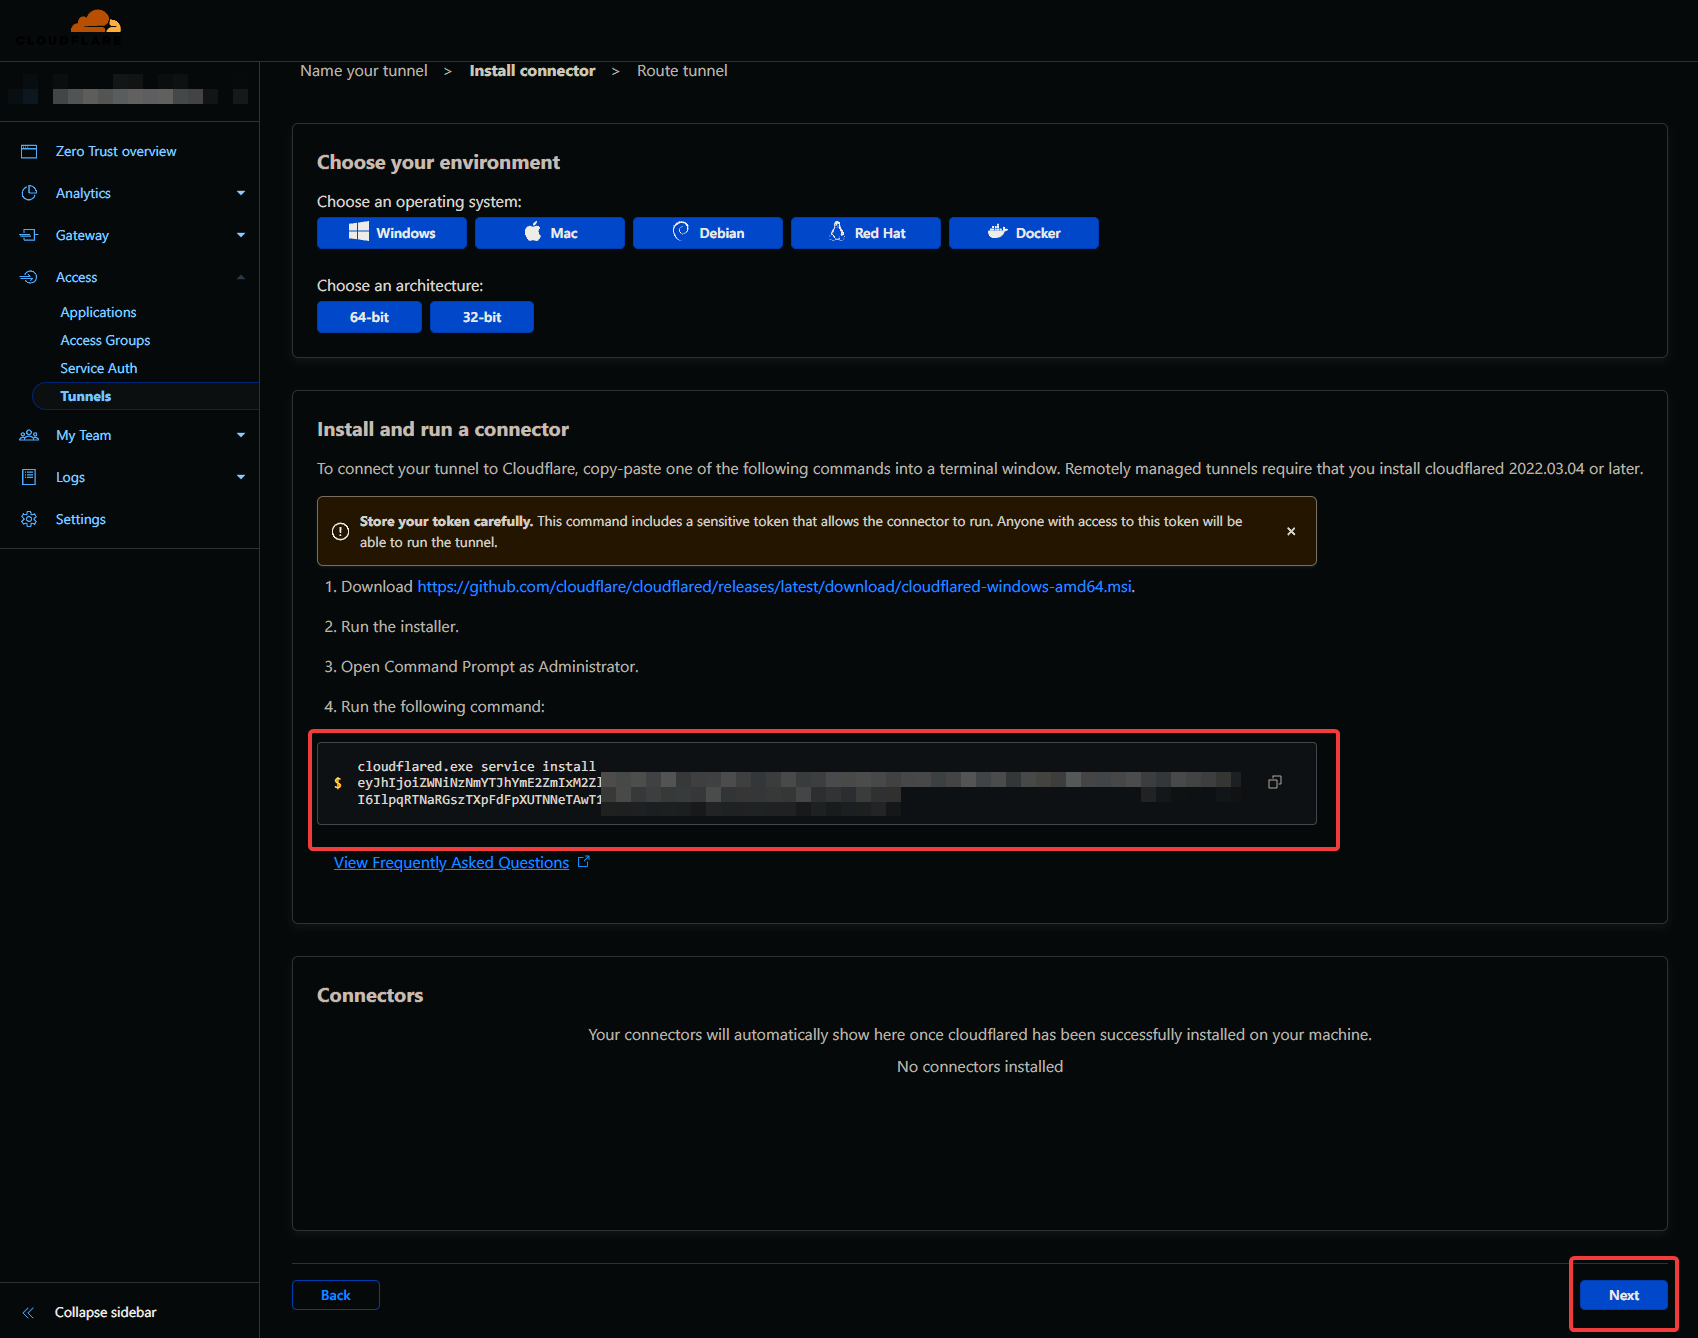
7. You'll then see "Install and run a connector", click where it says "cloudflare.exe service install" and it will copy your tunnels token. This is what we need to connect our service to your domain name. Paste copied text in the discord setup channel we are communicating in.
8. Finally, on the next page, type in the subdomain name you want your CRCON instance to live at. For example- If your domain name was "hll.com" and you wanted CRCON to live at "rcon.hll.com"- You would type "rcon" in the subdomain field, then select hll.com from the dropdown box directly to the right (do not select anything in the path field to the right of the domain dropdown). Then select HTTP below that for service type. Either Noodle or Squidd will provide you with what needs to be put in the URL section.
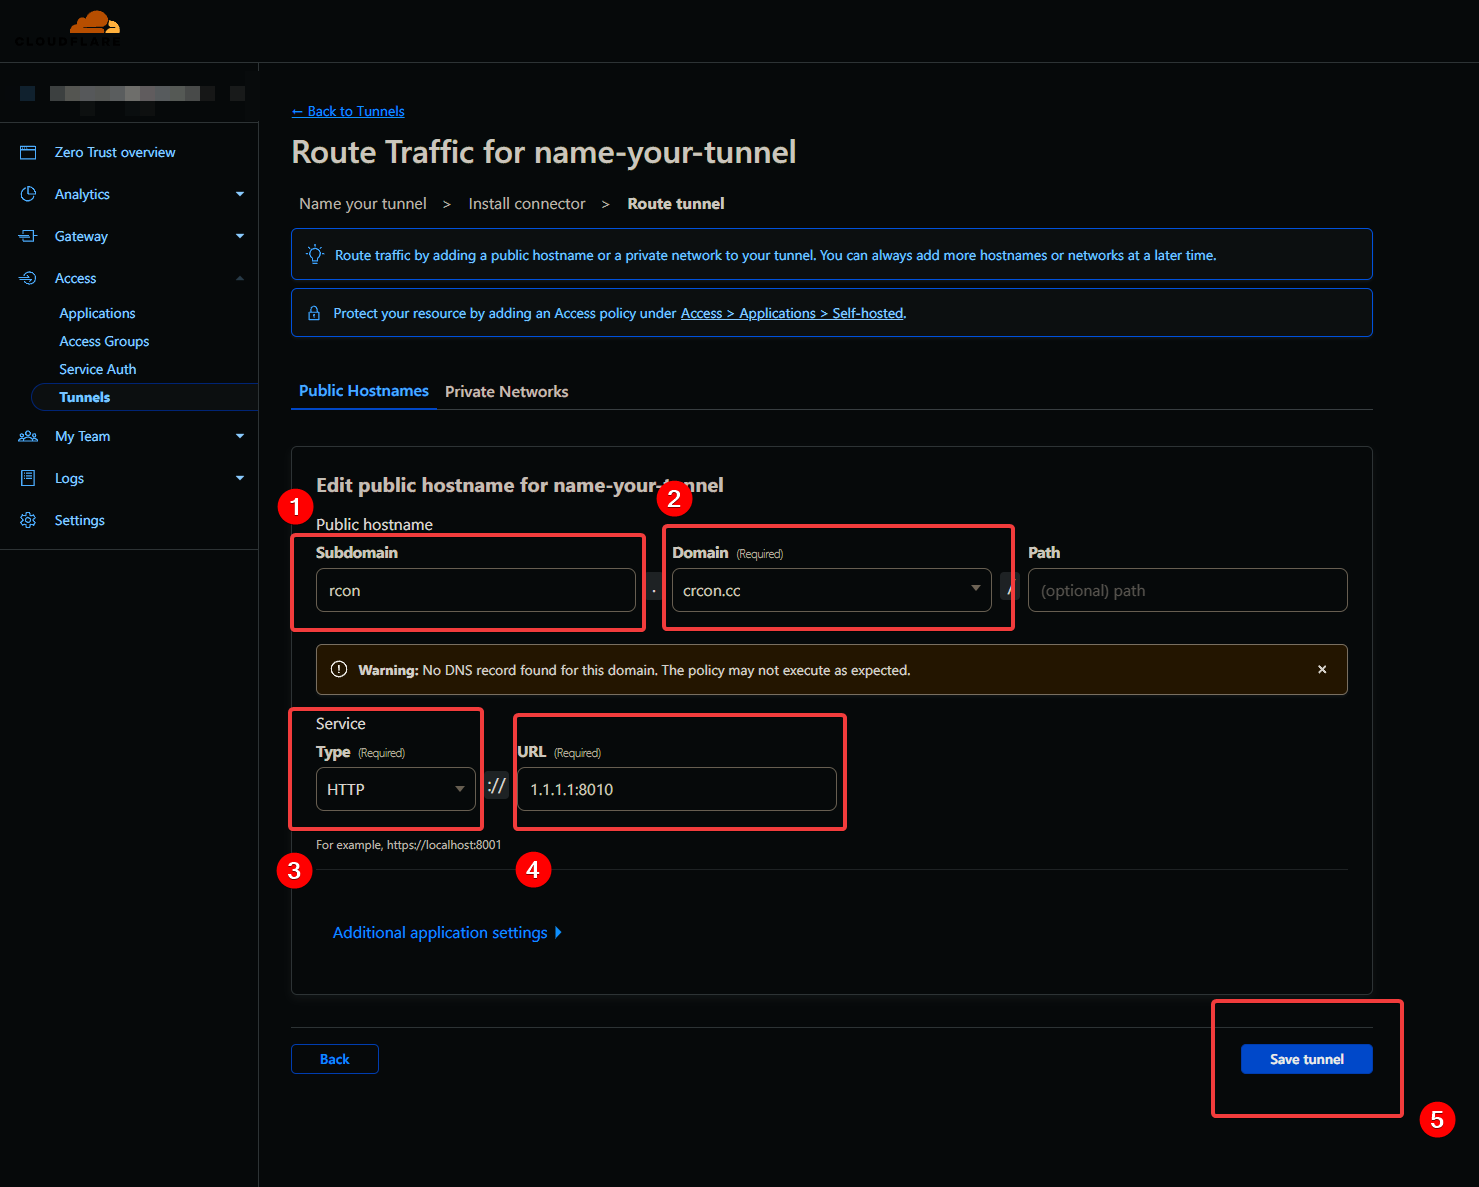
Step 8 in the process will need to be done twice, once for your CRCON instance, and once for your server's Stats Page. You would use "stats.hll.com", and we will supply you with the URL to enter into the final field. Please let us know before you're going to get this set up, so we can have the URLs ready for you.
Let me know if you have any questions! Looking forward to working with you guys!